the grains of life...living...growing...writing...baking...cooking...crafting

Wednesday, July 3, 2013

Michelle's Old Fashioned Yeast Rolls

This is my holiday go-to roll recipe.  I've been making them for about twenty years.  They are tried and true and enjoyed by all.  They are great the first day you make them for a holiday sit down meal with ham or turkey, mashed potatoes, gravy, and the whole works.  The are equally enjoyed on the second day topped with slices of ham or turkey for a quick breakfast or lunch.  I wish to give you a warning, though, when I leave them out in plain sight they tend to disappear much faster.  If you want to make them last, hide them.  I hope you and yours enjoy the recipe.  Thank you, Jerri, for requesting the recipe!
  • 1 teaspoon sugar
  • 1 teaspoon salt
  • 1 package dry yeast
  • ½ cup water
  • 2 eggs
  • 7 cups all-purpose flour
  • ½ cup sugar
  • 1 cup shortening
  • 2 cups water
Combine first 5 ingredients in a mixing bowl. Mix for 2 minutes on low speed with electric mixer. Set aside this yeast mixture.


Combine flour with remaining ingredients in a large mixing bowl. Mix 3 minutes with a heavy duty electric mixer (dough hook attachment works best) at medium speed. Your dough at this stage will be thick and somewhat lumpy.


Add yeast mixture and mix 3 more minutes at medium speed.  Roll into an oval shape with your hands and place in a clean well-oiled bowl.  It should look about like this now. 


Cover  with a cloth and let rise in a warm place (85°F), free from drafts, about 3 hours or until dough has doubled in size.  I often leave the bowl of dough under a kitchen light - like the one over the stove or one over the counter.  This will usually give the dough just enough extra heat.
 
Punch dough down.  Cover with a fitted lid or plastic wrap and refrigerate overnight.  On occasion I have rushed this process, but they are better if you wait.  Just mix up the dough one evening, and put it in the refrigerator until morning or later afternoon when you are ready to shape the rolls.  With lightly floured hands, shape dough into 2-inch balls.  I dump about half a cup of flour or so onto the dough.  Then I pinch off pieces of dough and dip the dough and my hands into the flour as I shape the rolls - just enough to keep the dough smooth and sticky-free.
 
Place rolls in 3 greased 9-inch round pans.  I prefer glass ones.  Let dough rise in a warm place (85°F), free from drafts, about 2 hours or until rolls double in size.  Bake rolls at 400°F for 10-12 minutes until lightly browned.

You can rub butter over the tops of hot rolls straight from the oven if you like.  I also have a recipe for cinnamon rolls using this dough.  Check back later for that one.

Makes about 2 ½ dozen.

Sunday, April 14, 2013

Blueberry Morning Cake

Last weekend I made this cake for the women’s retreat.  Several people asked about the recipe so I am including it here.

This is a great cake to make especially as blueberries come into season, but frozen blueberries also work quite well.  It is pretty easy to make and works equally for a brunch or lunch dish as well as for dessert.  To make this for a 9x12 inch pan, I use 1 ½ times the ingredients.  You could also bake this in a loaf pan or in a round cake pan and cut wedges.  It is a very versatile recipe.  I hope you all enjoy it.

Blueberry Morning Cake

Cake: 
  • 1 ½ cups all-purpose flour
  • ½ cup white sugar
  • 2 ½ teaspoons baking powder
  • 1 pinch salt
  • ½ cup milk
  • ¼ cup vegetable oil
  • 1 egg
  • 2 cups blueberries

Topping:
  • ⅓ cup all-purpose flour
  • ½ cup white sugar
  • ¾ teaspoon ground cinnamon
  • ¼ cup margarine

Preheat oven to 350°F. Grease and flour a 9 inch square pan.

In a large bowl, mix together the flour, sugar, baking powder, and salt.  Make a well in the center and pour in the milk, oil, and egg.  Mix well.  Stir in the blueberries.  Pour into prepared pan.

For the topping combine ⅓ cup flour, ½ cup sugar, and ¾ teaspoon cinnamon in a small bowl.  Cut in the margarine until crumbly.  Sprinkle over cake.

Bake in preheated oven for 30 to 40 minutes, or until a toothpick inserted into the center of the cake comes out clean.  Allow to cool.  Enjoy.

This cake slices nicely if allowed to cool thoroughly first.

Grains of Life - Joy

I am going to tackle another topic on this blog that relates to grains.  This one is called the Grains of Life.  In the future you will be able to spot all of the Grains of Life posts under the Grains of Life label.  Please check back.  I look forward to your feedback as we sift through together.

Since I began planning this blog last Fall, I have spent quite a bit of time thinking about grains of various kinds:  food grains, the grain of fabric, the grain of wood, etc.  The word grain has a lot of definitions.  One of the definitions for grain is "an essential quality or characteristic."  I am going to use this definition in looking at the Grains of Life as they relate to the Christian life.

For several months I spent time preparing for a women's retreat on the topic of joy that was held last weekend.  Joy is one of the fruits of the spirit that Paul talks about in the book of Galatians.  As Christians our lives should reflect the fruit of the spirit.  In Christ we have every reason to be joyful.  By this I don't mean a false sense of joy where we just fake it to the rest of the world and everything appears peachy.  I mean genuine joy in life and in living it regardless of our immediate circumstances from day to day.

It's the kind of joy that we can live out even when we are experiencing difficulties.  It's what we have in Christ despite the difficulties of life whatever they may be.  There's joy in knowing that we do not walk this road alone.  Jesus is there every step with us, and he's given us people around us to share in the journey.

Anyone can experience joy when things are going along well or they're going just the way we want.  Having joy when things are not going well is another story.  Having joy when you didn't get your way or when you've lost a loved one or when you didn't get the promotion you wanted or when you don't happen to feel particularly happy for whatever reason...now that's saying something.  Christ in us gives us this joy.  Just knowing that nothing is going on in your life that your Creator doesn't know about is comforting.  He truly doesn't allow anything that he does not and can not and will not equip us to be able to handle in one way or another.

This kind of joy gives us confidence, not in ourselves but in our Savior and His plans.  Jeremiah gets it when he writes, "But blessed is the man who trusts in the Lord, whose confidence is in him" (Jeremiah 17:7).  Our confidence comes from our trust in our God and His plans, not from ourselves or our ability outside of our Lord.

Joy is one of the one of the essential qualities or characteristics or grains, if you will, of the Christian life.  A joy-filled life is a testimony to our Lord's sustaining power no matter the circumstances.

Wednesday, March 27, 2013

Dreamy Orange Puffs

For Christmas last year I made some cookies, soups, and cakes for family and friends for Christmas.  I layered all of the dry ingredients in pint or quart mason jars, decorated the lids, and tied on decorative labels with the wet ingredients to add and the instructions.  They were a huge success.  Everyone liked them.

One particular cookie recipe, Dreamy Orange Puffs, was a favorite of several people.  I chose to make that one in memory of my mother.  Orange was one of her favorite flavors.  She loved orange sherbet and vanilla ice cream swirled together.  The sugar coated orange jellied slices that you could buy in the clear package on the candy aisle were among her favorites.  I can remember on many a Christmas receiving orange tic tacs in my stocking.  I think my mother had something to do with it.

One of my sister-in-laws asked me recently for this recipe so I thought I would put it out there for everyone.  Enjoy!!

The first “recipe” is for making them once for you.  The second is for making them up in glass jars to have on hand to give away as gifts or for you and your family for later.  It is nice to have a stock of these on hand because they make such nice gifts for: a sick friend, a new neighbor, a birthday surprise, or an everyday “I’m thinking of you” gift.

Thanks for asking for this one, Misty.   

 Dreamy Orange Puffs

·         ½ cup orange flavored instant breakfast drink powder (you can usually find this on the aisle with lemonade)
·         ¾ cup sugar
·         1 ¾ cup all-purpose flour
·         ½ teaspoon baking soda
·         ½ teaspoon baking powder
·         1 stick softened butter or margarine
·         1 egg
·         1 teaspoon vanilla
·         1 ½ cups vanilla chips (on the aisle with chocolate chips)


In a large mixing bowl combine the orange drink powder, sugar, flour, baking soda, and baking powder.  Mix together well.  Using an electric hand mixer or a large wooden spoon beat in the butter or margarine, one egg, and vanilla.  You may need to use your hands.  The dough will be sticky.  Stir in the vanilla chips.

Shape dough into balls the size of walnuts.  Place 2 inches apart on greased baking sheets.

Bake at 375°F for 12 to 14 minutes.  Cool for 5 minutes on baking sheet.  Remove to cooling racks or a plate to finish cooling.

Makes 2 1/2 dozen cookies.


Dreamy Orange Puffs in a Jar

·         ½ cup orange flavored instant breakfast drink powder (you can usually find this on the aisle with lemonade)
·         ¾ cup sugar
·         1 ½ cups vanilla chips (on the aisle with chocolate chips)
·         1 ¾ cup all-purpose flour
·         ½ teaspoon baking soda
·         ½ teaspoon baking powder
·         1 stick softened butter or margarine
·         1 egg
·         1 teaspoon vanilla

In a clean quart size glass jar, layer the orange drink powder.  Press firmly into bottom of jar.  Next pour in the sugar.  Very gently shake jar from side to side to level out sugar.  Then carefully add the vanilla chips.

In a separate bowl mix the flour, baking soda, and baking powder together.  Mix well.  Carefully spoon the flour mixture into the jar on top of the vanilla chips.  You will need to press the flour in firmly and repeatedly to get it all to fit into the jar, but it will go.

If you are giving this away as a gift, add the following directions to a card and attach it to the jar so your gift can be enjoyed.

Empty contents of jar into large mixing bowl.  Use large spoon or your hands to thoroughly blend ingredients.

Add 1 stick softened butter or margarine, 1 egg slightly beaten, and 1 teaspoon vanilla (optional).

Thoroughly mix together.  The dough will be sticky.  You may need to finish mixing with your hands.

Shape dough into balls the size of walnuts.  Place 2 inches apart on greased baking sheets.

Bake at 375°F for 12 to 14 minutes.  Cool for 5 minutes on baking sheet.  Remove to cooling racks or a plate to finish cooling.

Makes 2 1/2 dozen cookies.

Wednesday, March 13, 2013

Hubby's Favorite


My chicken casserole is one of  my husband's favorite meals.  He absolutely loves it.  Sometimes I make it for just us, and other times I make it for company.  It also makes a great dish to take to church gatherings, family get-togethers, or any occasion that calls for covered dish. 

Depending on your schedule, you can cook the chicken one night while you're doing other things and then assemble and bake it the next night.  It takes next to no time to assemble it.  We serve it with a couple of vegetables and with the stuffing baked right in with the chicken that's really all you need.  Sometimes I add a fruit salad or a fruit based dessert to the meal. 

There are also several options depending on your likes.  Some chopped onion and celery go well in this dish.  I saute them in a little olive oil or butter while the chicken is cooking and then dump them in the casserole with everything else.  If you have some on hand, fresh garlic is always the better choice.  Sometimes I also substitute a can of cream of celery soup for one of the cream of chickens.  You can also experiment with the cheese.  We really like cheddar in this dish.

I am sorry there aren't more pictures of the process with this dish, but hubby was in a big hurry for dinner, and I forgot.  I was able to snag one picture before it all got gone.  Maybe next time.  Hubby says that's a mighty big maybe.


Chicken Casserole

·         3 large boneless, skinless chicken breasts
·         2 cans cream of chicken soup
·         2 cups dry stuffing mix (reserve ½ cup)
·          ¾ cup milk
·         1 cup shredded cheddar cheese
·         1 teaspoon dry mustard
·         1 teaspoon sage
·         ½ teaspoon onion powder
·         ½ teaspoon thyme
·         ¼ teaspoon garlic powder
·         ⅛ teaspoon black pepper


Fill medium-sized pot about three quarters full of water.  Add chicken breasts.  Bring to a rolling boil.  Lower heat but maintain boil.  Cook for 30 minutes or until done.  Remove chicken from water and place on cutting board.  Using two forks pull chicken breasts apart shredding chicken into bite size pieces. 

Preheat oven to 350ºF.  Spray a 9x13 inch glass dish with non-stick cooking spray.  Set aside.

Place shredded chicken in large mixing bowl.   Add cream of chicken soup, 1 ½ cups stuffing mix, milk, cheese, and spices.  Mix well with a large spoon.    

Scoop into glass dish spreading and flattening mixture into corners.  Bake at 350ºF for 30 minutes.  Sprinkle reserved stuffing mix over top of casserole.  Return to oven for 15 more minutes.


Wednesday, February 27, 2013

Jewish Apple Cake


Apples are still in season here in North Carolina for a little while longer.  One of my favorite cakes to make when apples are in season is this one, Jewish Apple Cake or as it's called in Philadelphia, the Philadelphia Style Apple Cake.  It serves up a lot of large slices for a family get-together or a church supper or just anytime you're having friends over for a meal.  You could also make it ahead of time and freeze it until later for a special event or you could make it and freeze individual slices just for yourself.

Jewish Apple Cake
(or Philadelphia Style Apple Cake)

·         6 cups peeled and thinly sliced Granny Smith apples (about 3 large)
·         1 ½ cups plus 5 tablespoons granulated sugar, divided
·         4 teaspoons cinnamon
·         3 cups all-purpose flour
·         1 tablespoon baking powder
·         ½ teaspoon salt
·         4 eggs
·         ½ cup light brown sugar
·         1 cup vegetable oil
·         ½ cup orange juice
·         2 ½ teaspoons vanilla

Preheat oven to 350ºF.  Grease, sugar, and flour a 10-inch tube pan.

Combine apple slices with 5 tablespoons granulated sugar and cinnamon.  Stir well but gently.  Set aside.

Combine flour, baking powder, and salt in a bowl.  Set aside.

Beat eggs with remaining granulated sugar and brown sugar.  Add vegetable oil, orange juice, and vanilla.  Beat well.  Gradually blend the flour mixture into the egg/sugar mixture.  Mix until well blended, about one minute.

Pour one third of the batter into the prepared tube pan.  Top with half the apple slices, draining off any liquid.  Pour in another third of the batter and top with remaining apple slices.  Top with remaining batter, making sure the apples are covered.

Bake 55 to 60 minutes, until the top turns golden brown and a knife inserted near the center comes out clean.  Let cool 10 minutes in pan.  Turn out onto a wire rack and let cool completely.  Serves 16.  Remember, this cake freezes well.

Sunday, February 24, 2013

A Spicy, Rainy Kind of Day

Another cold weekend minus the icy precipitation but with a cold rain nonetheless called for a spicy dish to heat things up a bit.  With plenty of chicken in the freezer, I decided to make chicken enchiladas.  I actually call them my quick chicken enchiladas because instead of making my own enchilada sauce and my own tortillas, I use a ready-made canned enchilada sauce and packaged tortillas.  These shortcuts make quick work of a wonderful Mexican dish.

This recipe does require a bit of planning ahead because I marinate my chicken in extra virgin olive oil and spices for a couple of hours before I cook it.  The enhanced flavors make a little planning ahead the better choice.    

Quick Chicken Enchiladas

·         3 boneless skinless chicken breasts
·         ¼ cup extra virgin olive oil
·         ¼ teaspoon black pepper
·         ½ teaspoon ground mustard
·         ½ teaspoon garlic powder
·         ½ teaspoon onion powder
·         1 teaspoon chile powder
·         28 ounce jar enchilada sauce
·         8 flour tortillas
·         1 cup shredded cheese


Cut each chicken breast into 1/2 inch slices from the short end.  Cut each slice into two or three narrow strips.  Sprinkle bottom of a large container with olive oil.  Add chicken strips.  Top with spices.  Stir well.  Refrigerate marinating chicken for a couple of hours.  Mixture could be refrigerated overnight. 

Empty marinated chicken mixture into a large stir fry pan.  Stir fry chicken for about 10 to 15 minutes over medium high heat until fully cooked. 


Drain off excess oil.  Place chicken in a large glass bowl.  


Add half of the jar of enchilada sauce.  Stir well until chicken is well coated.  Spray a 9x13 inch glass baking dish with non-stick spray. 


Place about an eighth of the chicken mixture down the middle of the tortilla, wrapping it up in a tight roll. 


Add each wrapped tortilla to the glass baking dish butting the next one right up against the previous one. 


When all wrapped tortillas have been added to the baking dish, pour the remaining half of the enchilada sauce over them.


Sprinkle with shredded cheese.  


Bake in preheated 400 degree oven for about 20 - 25 minutes.    


Top enchiladas with a dollup of sour cream.  Serve with brown rice and refried beans for a delicious Mexican meal.

Monday, February 18, 2013

Snowy Day Lasagna

We've had several snowy days lately.  On Saturday I got to spend the entire snowy day at home.  I decided to do some baking.  I didn't want to spend all day in the kitchen though so I made what I call Quick Homemade Lasagna.  The noodles are from a box and my meat sauce recipe uses canned tomato sauce and paste.  It does take a little more time than making lasagna from an all included kit, but it is well worth it.  Please do not be intimidated by the length of the recipe.  I tried to provide detailed instructions.  Let me know what you think.

For this one I used ground beef, but I will often use ground turkey or ground chicken or some combination of the three.  When I use ground chicken I add a little thyme and sage to the other spices.  I think they help bring out the flavor of the chicken.

Now for the recipe...

Quick Homemade Lasagna

Ø  Quick Homemade Meat Sauce for Lasagna, Spaghetti, and other Italian Dishes:
·         1 pound 93/7 ground beef
·         ½ tsp. oregano
·         ½ tsp. basil
·         ¼ tsp. parsley
·         ¼ tsp. onion powder
·         ¼ tsp. garlic powder
·         Dash black pepper
·         2 - 15 ounce cans tomato sauce
·         2 - 6 ounce cans tomato paste
·         1 cup water
·         1 ½ tsp. oregano
·         ¾ tsp. basil
·         ½ tsp. parsley
·         ½ tsp. onion powder
·         ½ tsp. garlic powder
·         Dash black pepper

In large skillet over medium heat, scramble ground beef using a spatula.   Add first group of spices (oregano, basil, parsley, onion powder, garlic powder, and black pepper) to beef.  Continue cooking over medium heat until the beef is evenly browned and fully cooked.  If desired drain and discard any remaining grease from pan. 

In large glass mixing bowl combine tomato sauce, tomato paste, second group of spices (oregano, basil, parsley, onion powder, garlic powder, and black pepper) and water.  Stir together.


Add to cooked beef.  Stir.  Cover and continue cooking until mixture begins to bubble.  Remove from heat. Sauce is now ready to be used for lasagna, spaghetti, or other Italian dishes.    


Ø  9 lasagna noodles
Ø  2 tablespoons olive oil
Ø  16 ounce container low fat cottage cheese
Ø  ¼ cup shredded parmesan cheese
Ø  16 ounce package shredded mozzarella cheese
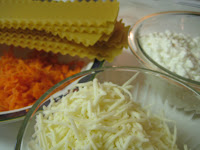
Ø  2 large carrots, peeled and shredded

In a large pot bring 6 quarts of water to a boil on high.  When water is boiling add oil.  Drop in lasagna noodles one at a time layering them in different directions.  Lower temperature to medium high, making adjustments so the pot won’t boil over but so that it keeps to a rapid boil.  Boil noodles for 14 minutes.

Drain noodles into colander.  Rinse thoroughly with cold water to stop cooking.

Preheat oven to 350 F.  Spray 9x13 inch glass dish with non-stick olive oil spray. 

Stir the shredded parmesan cheese into the cottage cheese. 

Spoon two large spoons of meat sauce into bottom of dish.  Layer three noodles lengthwise in dish.  Add half of the cottage cheese mixture.  Add a third of the shredded mozzarella.  Add half of the carrots.  Layer a third of the meat sauce. 

Layer another three noodles.  Add the remaining half of the cottage cheese mixture.  Add another third of the shredded mozzarella.  Add the remaining half of the carrots. Layer another third of the meat sauce. 

Layer the last three noodles.  Top with the remaining meat sauce and sprinkle with the last of the shredded mozzarella.

Bake for 25 minutes.  Allow to cool for 10 minutes before serving.         

Sunday, January 20, 2013

Twice Baked Potatoes


This baked potato upgrade has become quite a traditional dish during the past two decades.  It makes a great appetizer or game day food, and it's really not hard.  Many people who make baked potatoes use these same ingredients.  They just sprinkle them on top of the potato.  Here you scoop out the insides, mix things up a bit, and stuff them back inside the potato.

·         4 large baking potatoes
·         Garlic salt
·         ½ cup sour cream
·         1/3 cup milk
·         1 cup shredded cheddar cheese
·         8 slices cooked bacon, crumbled
·         Black pepper
·         Olive oil
  
Preheat oven to 350°F.  Wash potatoes.  Using a sharp knife remove any blemishes.  Dry potatoes with a clean paper towel.  Sprinkle garlic salt on potatoes and wrap each one individually in aluminum foil.   Place them on a baking sheet and bake for 1 hour 15 minutes.  Remove from oven.  Allow potatoes to cool in foil on baking sheet for one hour.  Unwrap potatoes and slice in half lengthwise.  Carefully scoop out insides of potatoes with a spoon being careful to leave a small edge all the way around each potato.

Place scooped out potatoes into a large bowl and thoroughly mash.  Place potato shells on baking sheet.

Add sour cream, milk, half of shredded cheese, and half of crumbled bacon to mashed potatoes.  Add black pepper to taste.  Mix well.

Apply olive oil to bottom of potato shells.  Spoon potato mixture into shells.  Divide cheese among each potato half.  Top with remaining crumbled bacon. 

Bake for an additional 15 to 20 minutes at 350°F until cheese is bubbly.